Valentine's Day is such a fun celebration of love! I'm going to share my favourite Valentine's Day Cake Design 3 ways!
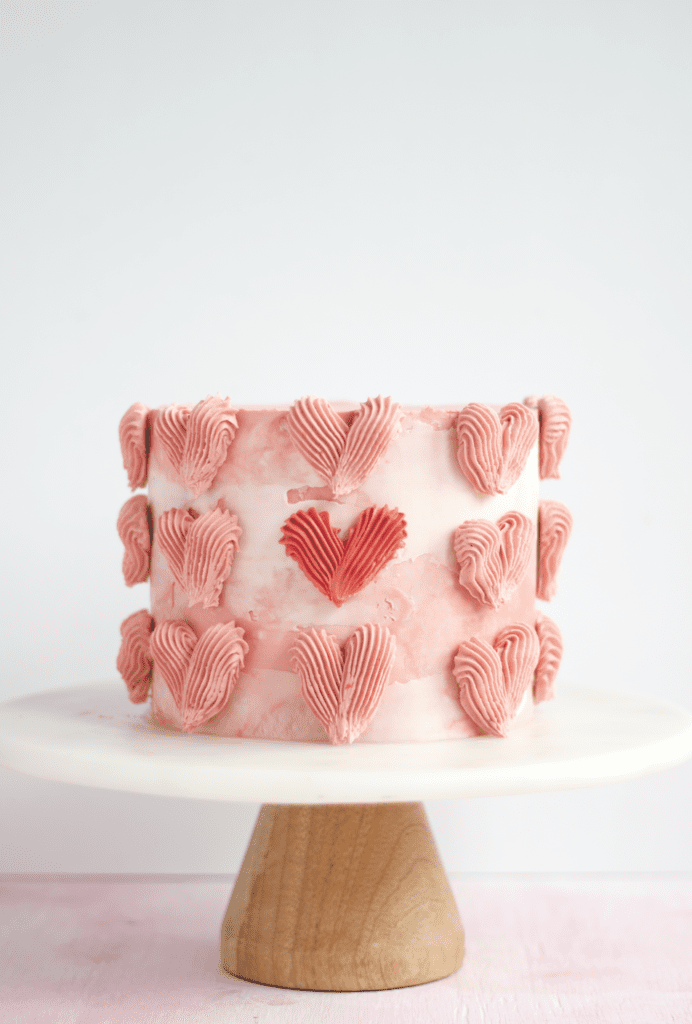
How to Make this Cute Buttercream Piped Heart Cake Design
You'll need:
- A cake baked and base frosted in the colour of your choosing. I frosted mine watercolour with pink and white using my Swiss meringue buttercream recipe.
- About 30, 3"x3" squares of parchment paper
- Buttercream frosting
- Gel colouring
- Wilton 4B piping tip
- 2 piping Bags
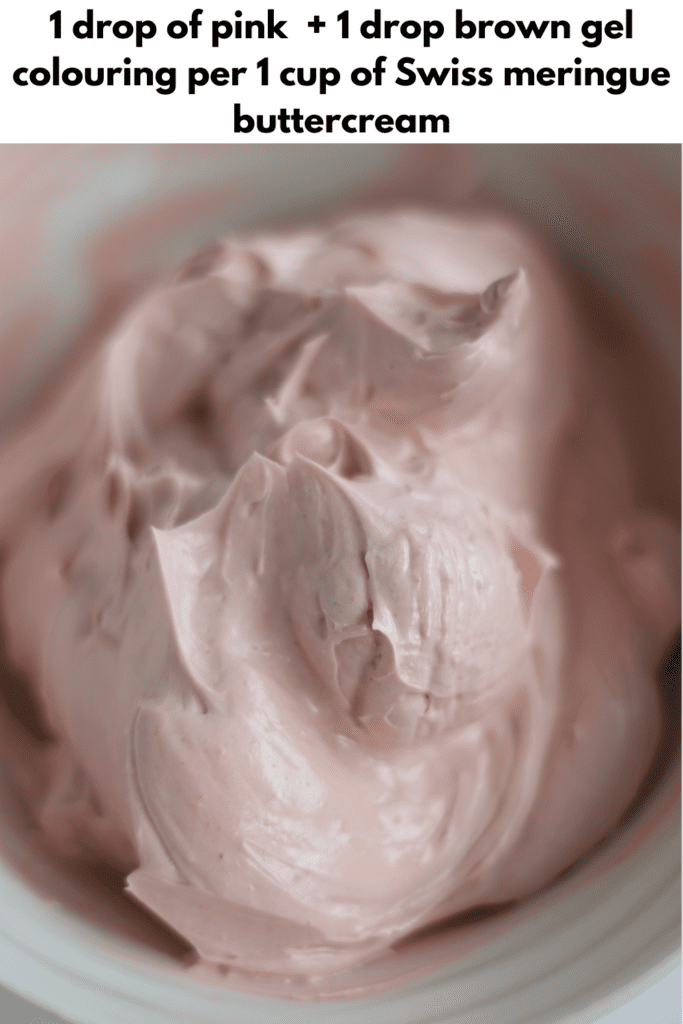
How to pipe buttercream hearts
Begin by making your buttercream frosting. Separate it into two small bowls. Colour one bowl pink and one bowl red. For the cake above I only piped one red heart while the rest were pink, but you can decide how many red vs. pink you would like. Adjust the amount of buttercream in each bowl accordingly.
Next fit your piping bags with the 4B piping tips and fill with frosting.
Onto each parchment square, pipe a heart. Hold the piping bag at a 45 degree angle to the parchment paper. Apply moderate pressure allowing buttercream to gather in a dollop and then pull back in a diagonal line while releasing pressure. Repeat in the opposite direction to complete the heart.
Place parchment squares into the fridge for 25 minutes to harden.
Once buttercream piped hearts are chilled, use your offset spatula to remove them from the parchment paper.
Apply a small dollop of buttercream to the back of the piped heart and apply it to your cake. Repeat!
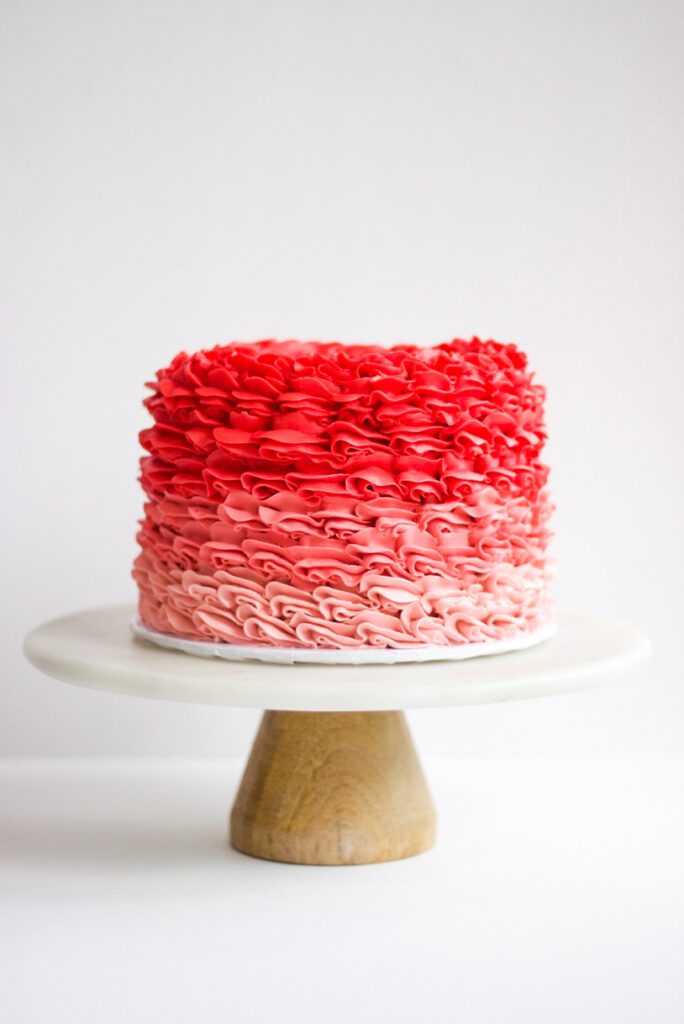
For this Ruffle Valentine's Day Cake Design
You will need:
- A cake baked and crumb coated. For this cake, I used my vanilla cake recipe with oil
- Buttercream frosting. I used my Swiss meringue buttercream recipe.
- Red Gel Colouring
- Wilton 1M piping Tip
- 3 piping bags
How to Pipe Buttercream Ruffles
Begin by fitting each piping bag with a Wilton 1M piping tip. If you do not have three 1M tips, do not worry! Fill your piping bag with the colour you intend to be at the base (bottom) of your cake.
Separate your buttercream into 3 bowls. Add one drop of red to the first bowl. This will be your pink base. Add two to three drops of red to your second bowl, this will be the middle pink colour. For your last bowl, add 5-6 drops of red. If you find the red isn't dark enough, you can heat the buttercream over a double boiler for about 10-15 seconds. This will depend the colour.
Hold your piping bag at a 45 degree angle. Apply moderate pressure to the piping bag and allow a blub of buttercream to form. Gently raise the piping bag up and then pull it down and back onto the cake board. Repeat this process beginning the next ruffle on the tail of the first you piped.
Once you complete a full find of ruffles around the cake, repeat the process a second time around the cake with the same colour. Switch the colour and complete two rings of ruffles with your second colour. Repeat.
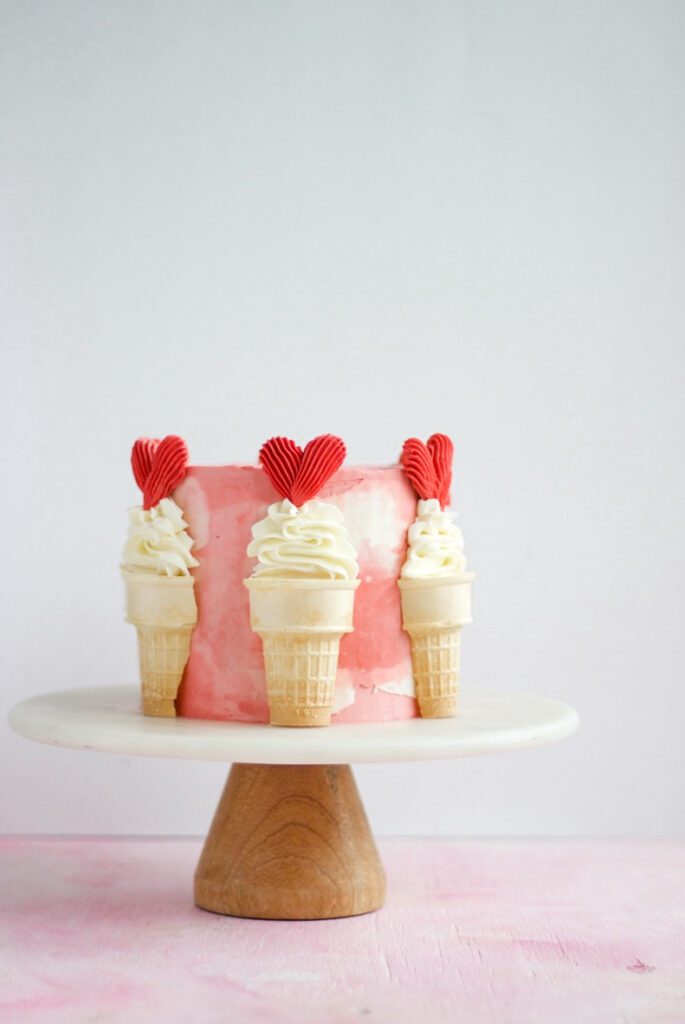
To create this fun and easy ice cream cone cake Valentine's Day Cake Design
You will need:
- A cake base frosted in the colouring of your choosing. I frosted mine a watercolour pink and white buttercream frosting. I used my fluffy chocolate cake recipe
- Buttercream Frosting. I used my Swiss meringue buttercream recipe.
- Ice cream cones
- Gel Colouring
- Wilton 1M and 4B piping tips
- 2 piping bags
- 6-8 parchment squares
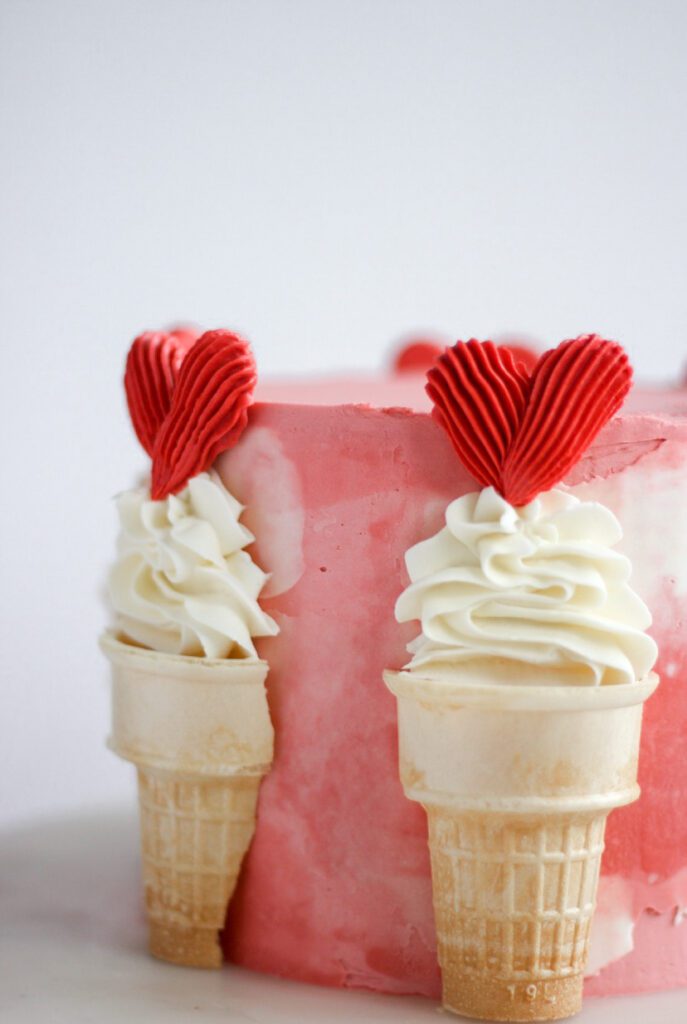
How to Create Heart Ice Cream Cones
Begin by making your buttercream frosting. Separate the frosting into two bowl. Colour one bowl of frosting red and leave one white.
To create red buttercream. I use the Wilton colour right system and use the red gel colouring. To darken the colour, I heat the buttercream over a double boiler for 10-15 seconds. Allow it to return to room temperature and then re whip it.
Fit one piping bag with your Wilton 1M piping tip and fill it with the white buttercream.
Place the Wilton 4B piping tip into your second piping bag and fill with red buttercream frosting.
Onto each parchment square, pipe a heart using the wilton 4B piping tip. Hold the piping bag at a 45 degree angle. Apply moderate pressure allowing buttercream to gather in a dollop and then pull back in a diagonal line while releasing pressure. Repeat in the opposite direction to complete the heart.
Place parchment squares into the fridge for 25 minutes to harden.
Cut ice cream cones in half using a serrated knife. Place them side lying to prevent breaking while cutting. Be very gentle when using knife to cut in half. Gently each piece onto the cake.
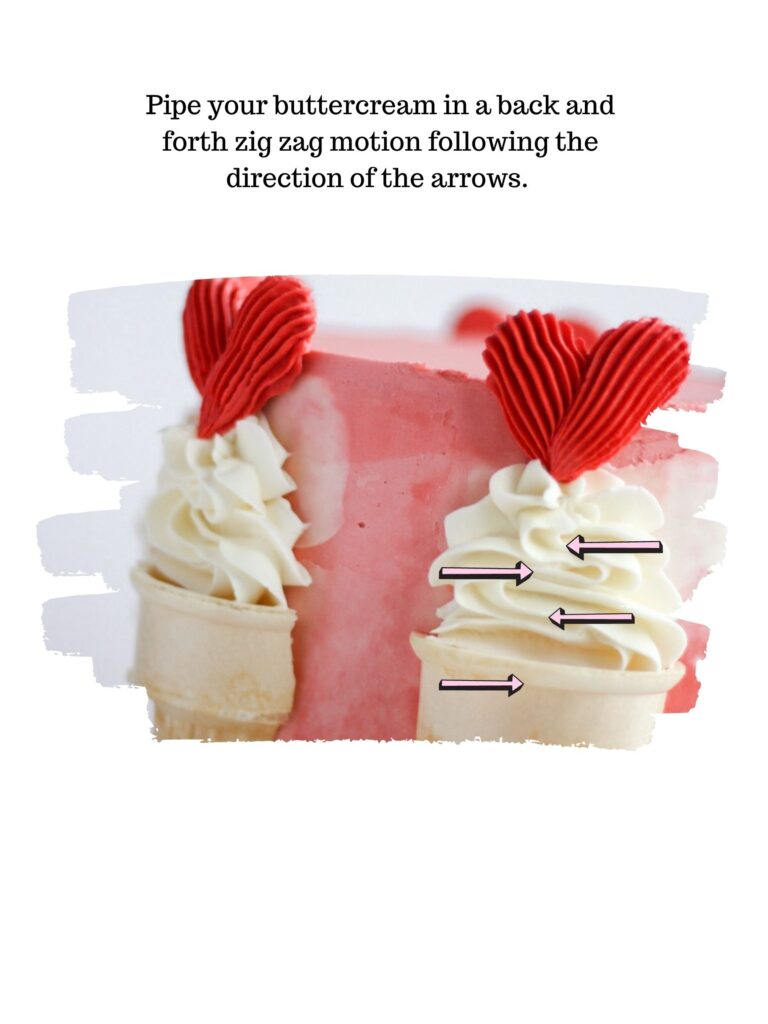
Use the Wilton 1M piping tip to "fill the ice cream cone" using moderate pressure and moving in a back and forth zig-zag motion.
Once your buttercream piped heart has chilled, remove it from the fridge. Take it off the parchment paper and gently place it on top of the frosted ice cream cone. Move quickly in this stage so the heart doesn't melt in your fingers!

If you try these Valentine's Day cake design ideas, make sure you take a photo and tag BAKED by Blair on social media and use the #bakedbyblair. I would love to hear how you enjoyed these mini tutorials, so comment below! If you want to pin this idea and save it for later, go ahead and click the pin button above and save it to your favourite desserts board on Pinterest! ENJOY!












Danielle Guidetti says
This was fun. I loved learning how to make homemade cake flour and It was my first time making Swiss Meringue Buttercream. Oh and loved learning how to make the shade of pink with the pink and brown.
Victoria says
I enjoyed making this cake! Had fun piping the hearts and making different colours. Im really happy with how your chocolate cake recipe turned out too!
Blair Braz says
Your cake looked amazing! I'm glad you loved the chocolate cake too. It's my favourite 🙂
Maria says
I just finished the design with the little hearts attached to the sides. Absolutely loved learning that new technique! I definitely want to know how you achieved that marble look 😍 pretty sure I’m going to end up trying the other two designs at some point anyways - these look fab!
Blair Braz says
Incredible! I would love to see your beautiful cake!! Please send over a photo 🙂